Cleaning your grill brush is essential to ensure a clean and hygienic grill for your next barbecue session.
If your grill brush has been gathering grease and gunk or sitting in a bucket of rainwater, you’ll need to give it a good clean before using it on your grill grates.
- Step-by-Step: Cleaning Your Grill Brush the Right Way
- General Care Tips for Grill Brushes
- When Should You Clean Your Grill Brush?
- Avoid These Practices When Cleaning Grill Brushes
- To Clean or Replace: What’s Best for Your Grill Brush?
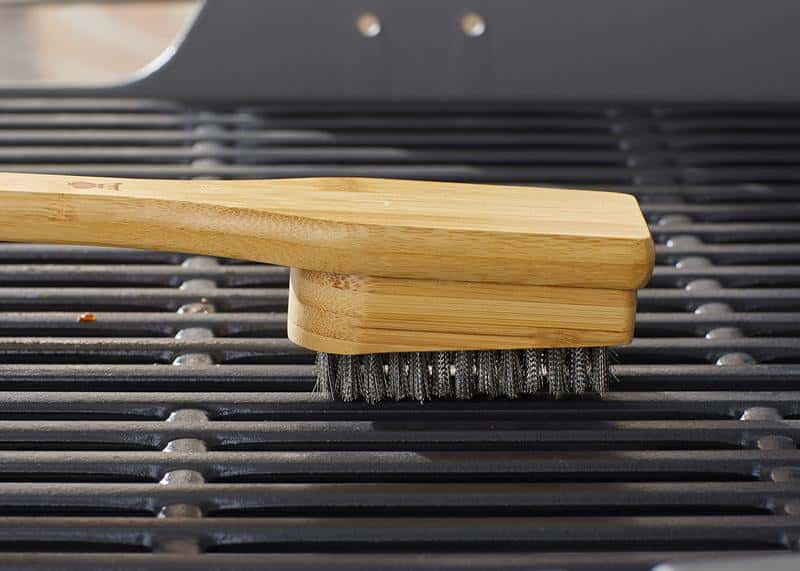
Step-by-Step: Cleaning Your Grill Brush the Right Way
Here’s a simple guide to help you clean your grill brush effectively:
1. Remove Large Debris:
Start by tapping your grill brush firmly against a hard surface to dislodge any large chunks of debris from the bristles.
2. Brush Away Bristle Debris:
If you have a second grill brush, use it to remove debris caught in the bristles of your primary brush. Put the two brushes together with their bristles facing each other and rub them against each other to dislodge any trapped debris.
3. Soak and Scrub:
Fill a bucket with warm soapy water and place your grill brush inside. Let it soak for a few minutes, allowing the soapy water to penetrate the bristles. Then, scrub the bristles against each other or use the second grill brush to scrub away any remaining grease and debris.
4. Rinse and Dry:
After scrubbing, rinse your grill brush thoroughly under cool running water. Make sure to remove all soap residue. Hang the brush to air-dry before storing it in a cool, dry place.
General Care Tips for Grill Brushes
- Opt for a stainless steel brush, which won’t rust like brass brushes and is easier to maintain.
- Pre-clean your grill grates with crumpled aluminum foil before using the grill brush to prevent any damage.
- Always store your grill brush indoors, away from moisture and heat.
- Rinse your grill brush after each use to remove any residue, extending the life of the bristles.
- Heat your grill to its maximum temperature with the lid closed for 10-15 minutes before brushing to burn off any excess food particles.
when should you clean your grill brush?
Understanding when to clean your grill brush is essential for a clean and safe grilling experience.
Make cleaning your grill brush a part of your standard grilling routine, so it’s consistently ready for use.
Here are some straightforward guidelines to help you determine when it’s time to clean your grill brush:
- Assess the brush: If your grill brush appears visibly dirty or caked with grime, it’s time for proper cleaning. Keeping your brush clean ensures you won’t be spreading old grease and debris on your grill grates.
- Consistent cleaning: To maintain your grill brush in peak condition, make cleaning it a part of your regular grilling activities. After each grilling session, as you clean your grill, set aside some time to clean your grill brush too. This practice will help prolong its lifespan and keep it effective.
- Rust and deterioration: If your grill brush starts showing rust or signs of significant wear, consider investing in a new, high-quality grill brush. While regular cleaning can help prevent rust, it’s best to replace the brush once rust appears, ensuring a clean and safe grilling experience.
Avoid These Practices When Cleaning Grill Brushes
First and foremost, never use automotive cleaners like carburetor cleaners or engine degreasers to clean your grill brush.
These chemicals are not suitable for food preparation tools and can leave behind harmful residues that may jeopardize your health.
Another practice to steer clear of is using high heat to clean your grill brush.
Don’t place your grill brush in a fire or use the burners on your gas grill to burn off debris from the bristles.
Not only do you risk inhaling dangerous chemicals that can lead to serious health issues, but the extreme heat can also damage the stainless steel bristles, causing them to wear out prematurely.
To Clean or Replace: What’s Best for Your Grill Brush?
Grill brushes, like any other tool, have a limited lifespan, especially since they’re used frequently. So, how can you decide whether to clean or replace your grill brush?
Here are some pointers:
- Inspect the brush: Check for any cracks in the head or handle. If you find any, it’s time for a new one. Replacing a damaged brush is inexpensive and ensures safer grilling sessions.
- Bristles or wire coils: If the bristles on your grill brush are mangled, bent, or damaged, it’s time to retire it. A damaged brush won’t clean effectively and could harm your grill grates.
- Loose metal bristles: If you’re using a grill brush with metal bristles, examine it for loose bristles before every use. Loose bristles can end up in your food and pose a serious health risk. If you spot any loose bristles, discard the brush immediately.
- Rust: Watch out for rust, as it indicates that the metal is losing integrity and may break.
If your grill brush is covered with food debris but still in good shape, a thorough cleaning might be all it needs. You can refer to a step-by-step guide for cleaning your grill brush to help you with this process.
Tip: Seasonal grillers should wash, dry, and store their grill brushes at the end of each season. Inspect the brush before the next season and, if in good condition, continue using it.
For year-round grillers, consider replacing your grill brush at least once a year due to the constant wear and tear.
Related >> How Long Does A Grill Brush Last? (When to Replace It)
Final Thoughts
Regularly cleaning your grill brush ensures that it remains effective and safe for use.
By following the proper cleaning techniques and incorporating maintenance into your grilling routine, you’ll enjoy a cleaner and healthier grilling experience every time.
Greetings! I’m Chad, a 43-year-old barbecue aficionado hailing from the beautiful state of Texas. I’m thrilled to invite you on a culinary journey as we explore the art of grilling and smoking together. Through this blog, I aim to ignite your passion for barbecue by offering:
Scrumptious, time-honored BBQ recipes passed down through generations, guaranteed to tantalize your taste buds.
Expert guidance on mastering the grill, smoker, and diverse cooking techniques to elevate your barbecue game.
Recommendations on choosing the perfect tools and equipment tailored to your grilling requirements.
An inside look at the latest trends, innovations, and advancements in the ever-evolving world of barbecue.
")


")
